As much as I would like to do more, I just have to call this bathroom finished.
Behold, our little bathroom...
This is the view to the left as you walk into our bedroom.
I thought of many solutions to the sink-in-the-bedroom problem:
build a wall, room divider or screen, a curtain?
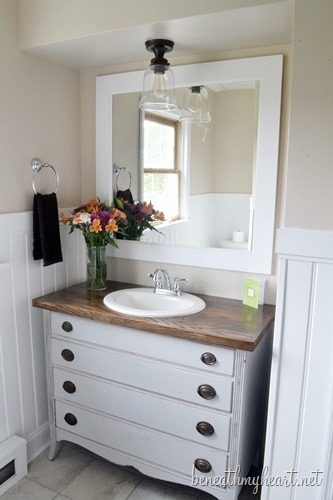
I thought about ripping out the vanity and finding a pretty dresser that we would plop a sink into, so it just looks like a dresser in the corner, and less of a-sink-in-the-bedroom, kinda like this:
But when I finally found the dresser that would be perfect, I chickened out and decided I wanted to keep it as my dresser. So I was looking for another solution and found this idea:
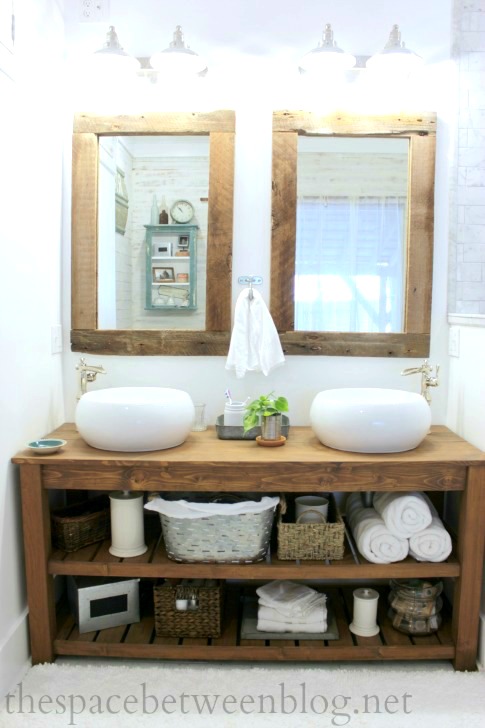
It kind of has a spa-feel and it seemed like the right mix of a doable project and
pretty enough to sit in the room. Obviously I didn't do exactly what she did here, it was just my inspiration.


Here's the complete list of what happened in our bathroom reno:
~Floating shelves above the toilet
~Sonya
painted this bathroom like 5 years ago, but with all the changes it
needed a new coat of paint, so I did that again. I also painted the
wood trim white in the bathroom.
~Greg installed a new toilet
~Our
interesting plumber installed a new shower valve. The older one was
super weird and ugly. Now we have the same shower valves in both
bathrooms, they look nice and work really well.
~Our friend who did the tile in the other bathroom did the tile floor in this little bathroom, too.
~Our
tile-fitting friend also re-did the caulking all around the shower, I
had been meaning to do it for YEARS! The shower tile was new and nice
enough to leave it as is.
~I built drawers and drawer fronts into what would otherwise be unused space in the vanity.
~Built the slatted shelf in the vanity, it's surprising how much storage we gained with this whole transition.
~I
used a mix of baskets from around the house, goodwill, and stores to
get the right amount of storage. The one I LOVE is the little wooden
box that I built in high school wood-shop class. I had totally
forgotten about it, but the family that I gave it to 20 years ago
decided that Mimi should have it. She can have it, just not right now!
~I painted the vanity (inside and out) with chalk paint (I'm now a believer)
~The
butcher block counter-top lends a bit of warmth to the room. I sealed
it with waterlox. I also tore out the backslash and repaired the wall
around the sink. My hope is that it feels less and less like a sink
that way. I wouldn't do this in the kid's bathroom or in a kitchen, but
this bathroom gets very little use and it's mostly Greg and I, so I
think the walls are safe.
~Greg's friend came over one night to help install the sink and butcher block--we have great friends!
~I wanted a different mirror for the kid's bathroom, so I pulled this one from there and into our bathroom
~I
painted the toe kick/molding under the sink brown to make it blend into
the carpet (hopefully) and then added feet to the vanity. (you guessed
it, more of a furniture feel, less of a sink vanity feel)
~I'm
pretty proud of my work, but one thing that isn't so easily noticeable
is the door. It used to swing INTO the tiny bathroom. So one day I
spent the whole day tearing out the door and frame and flipping it. My
hands were very sore and cut up. I had no idea what I was doing. But
it makes a HUGE difference having the door swing into our big bedroom
instead.
~I took the hooks from the kid's bathroom and put them in here. Before we had, like, 1 hook!
~We kept the old faucet to save money, I wanted this bathroom to cost
very little, and it did. The one splurge was the sink. I went with
that pretty rectangle one.
~Oh! I almost
forgot! while we were taking everything apart, I found that there had
been a very small leak and there was mold. ugh. So I ripped out the
bottom of the vanity and rebuilt all that too. (at that point I was
wishing I had torn out the whole vanity and installed the dresser after
all!) I also repaired the leak in the faucet. That made the whole
process much longer. But I learned a lot!
Someday we will:
~tear out the carpet and install hardwood floor!
~get a prettier shower door!
~different light fixture?
~perhaps a different mirror?
We are happy for now, because we've come pretty far:
Fall 2014
and this is Fall 2012
silly shelves for sure!
Now on to a new project!